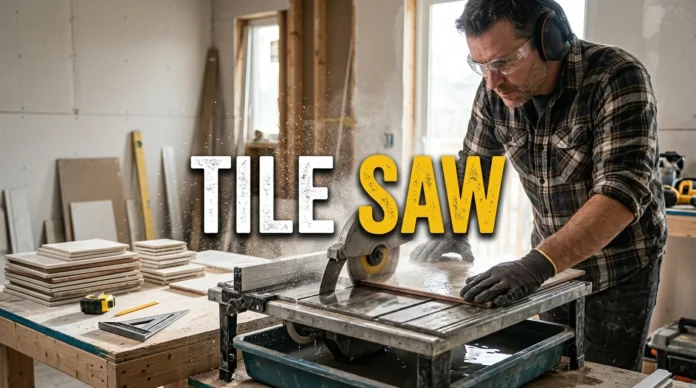
A tile saw helps make accurate cuts through ceramic, porcelain, glass, and many natural stone tiles. Most homeowners use a wet model because water cools the diamond blade and helps control dust. Choosing the correct saw, blade, and cutting technique can also reduce chipped edges and wasted material.
A wet saw is especially useful for projects that require repeated cuts, diagonals, notches, or dense materials. Small DIY projects may need only a compact tabletop model. Larger flooring and remodeling jobs often benefit from greater cutting capacity and a sliding table.
| Key Factor | What to Look For | Why It Matters |
|---|---|---|
| Saw type | Wet tabletop, sliding-table, or rail saw | Determines capacity and portability |
| Blade | Diamond blade matched to the material | Affects cut quality and chipping |
| Blade size | Commonly 7 or 10 inches | Influences cutting depth and saw size |
| Rip capacity | Larger than your biggest tile | Helps accommodate long cuts |
| Water system | Consistent blade coverage | Cools the blade and controls dust |
| Fence or guide | Square and adjustable | Helps produce straight cuts |
| Portability | Weight, stand, and setup requirements | Matters for storage and jobsite use |
What Is a Tile Saw?
This tool cuts hard, brittle materials used in floors and walls. Instead of a toothed woodworking blade, it normally uses a diamond-edged blade. Many models circulate water around the cutting area to cool the blade and limit airborne dust.
Wet saws are popular for bathroom floors, showers, backsplashes, entryways, and other tiled surfaces. They can handle cuts that are difficult with a manual snap cutter. These include notches, diagonal cuts, miters, and cuts through dense porcelain or stone.
The tool does not replace every tile cutter, though. Manual cutters can be quicker for repeated straight cuts on compatible material. The right choice depends on the tile, layout, cut shape, and amount of work.
Types of Wet Saws and Where Each One Works Best
Several designs fall under the tile-cutting category. Understanding their differences prevents you from buying more machine than your project needs. It also helps you avoid choosing a compact model that cannot accommodate your tiles.
| Type | Good For | Main Advantage | Main Limitation |
|---|---|---|---|
| Compact wet saw | Backsplashes and small DIY jobs | Portable and simple | Limited cutting capacity |
| Sliding-table wet saw | Floors, bathrooms, repeated cuts | Better control on longer cuts | Heavier and more expensive |
| Rail or bridge saw | Large-format tile | Handles long material | Requires more workspace |
| Manual tile cutter | Repeated straight cuts | Fast and relatively clean | Cannot make many complex cuts |
Compact wet saws suit homeowners working with smaller tiles and occasional projects. Sliding-table machines offer more support for longer or more frequent cuts. Rail systems become useful when large-format material exceeds a conventional table’s practical capacity.
Before choosing equipment, measure the largest tile in your project. Consider diagonal dimensions as well as straight rip length. A machine that handles a straight cut may not have enough capacity for the same tile on the diagonal.
Tile work also needs careful upkeep once it is installed, and Livingia’s floor tile grout cleaner guide covers keeping finished joints clean. Careful measurement matters before installation because small layout errors can become obvious later. Planning before cutting also reduces wasted materials.
How to Choose the Right Saw

Start with the material rather than the motor specification. Ceramic is generally easier to cut than dense porcelain or many stone products. Harder materials place greater demands on the blade, water supply, and machine.
Next, check the saw’s maximum rip and diagonal capacities. Your machine needs enough working room for the tiles you intend to install. Large-format tile can quickly exceed the practical limits of a small tabletop model.
Blade diameter also deserves attention. Seven-inch machines are common for household projects, while larger saws can offer greater cutting depth. Cutting depth matters more when working with thick stone, pavers, or similar materials.
Finally, consider where you’ll operate and store the machine. Wet cutting creates water and slurry, so choose a work area that makes cleanup easier. A folding stand or portable design can help when storage space is limited.
Diamond Blades: Matching the Blade to the Material
The blade can influence cut quality as much as the saw itself. Diamond blades come in designs intended for different tile materials and cutting conditions. Always confirm the blade’s diameter, arbor size, material rating, and wet-or-dry designation before installation.
Continuous-rim diamond blades are commonly chosen when a smooth finished edge is important. The steady rim can help limit chipping on brittle surfaces when paired with proper technique. Specialized blades are also available for porcelain, glass, stone, and other materials.
A damaged or worn blade can make even a good machine perform poorly. Slow cutting, excessive chipping, or unusual vibration can signal a blade or setup problem. Check alignment and water delivery before assuming the entire machine needs replacement.
How to Use a Tile Saw for a Clean, Straight Cut
Using a wet saw successfully depends on setup and steady movement. Don’t force material through the blade to finish faster. A controlled feed gives the blade time to cut and reduces unnecessary pressure on the tile.
1. Read the saw manual first. Check the manufacturer’s setup, blade, electrical, and safety requirements before operating the machine. 2. Install the correct blade. Confirm its material rating, diameter, arbor size, and intended cutting method. 3. Fill or connect the water system. Make sure water reaches the blade as specified by the manufacturer. 4. Measure and mark the tile. Use a clear line that remains visible while positioning the material. 5. Set the fence or guide. Confirm that the guide is square and supports the intended cut. 6. Position the tile securely. Keep it flat against the table and aligned with your cutting mark. 7. Feed the tile steadily. Let the blade work without twisting, rushing, or forcing the material. 8. Inspect the finished edge. Check accuracy before cutting additional pieces using the same setup.
Accurate layout work is especially important in bathrooms and kitchens. A small cutting error can create uneven joints near cabinets, fixtures, or walls. Livingia’s kitchen shelving units guide and sliding bathroom door guide offer additional planning ideas for these high-use spaces.
How to Reduce Chipping When Cutting Tile
Chipping usually deserves a setup check before you blame the saw. Blade condition, feed speed, alignment, and material support can all affect the finished edge. Water flow also needs to meet the equipment manufacturer’s requirements.
Start by confirming that the blade suits the tile. A blade intended for another material may leave a rougher edge. Replace damaged blades and inspect the machine if you notice wobbling or unusual vibration.
Feed speed also matters. Pushing too quickly reduces control and puts unnecessary stress on brittle material. Support the tile evenly and avoid changing its angle during the cut.
Test your setup on a spare piece whenever possible. That small test can expose alignment or chipping problems before you cut an expensive finished piece. It also lets you adjust your technique without risking needed material.
Tile Saw vs. Manual Tile Cutter
A wet saw isn’t automatically the right tool for every project. Manual cutters are useful for fast, straight cuts on compatible tiles. They also avoid the water management a wet machine requires.
Wet saws become more useful when the material or layout demands greater flexibility. They can handle many diagonals, notches, and harder materials that challenge manual scoring tools. Their main tradeoffs are additional setup, cleanup, noise, and equipment cost.
Many remodeling projects can benefit from using both tools. A manual cutter handles straightforward, repetitive work, while the wet machine tackles demanding cuts. This approach can reduce unnecessary saw setup during larger installations.
Important Safety Practices
Tile cutting combines electricity, water, rotating equipment, and brittle material. Follow the saw manufacturer’s instructions and use the protective equipment specified for your machine. Eye protection is especially important because small fragments can leave the cutting area.
Keep hands away from the blade and maintain control of the workpiece. Never bypass guards or safety components to accommodate an awkward cut. If the tile cannot be supported safely, find another approved cutting method.
Electrical setup also requires care around wet equipment. Use the power protection and connection method the manufacturer specifies. Keep plugs, connections, and extension arrangements away from standing water.
Good workspace planning can make the process safer and easier to manage. Keep unnecessary objects away from the cutting area and provide stable support. Livingia’s Crafts & Tools section can help you find more home-project guidance and tool-related information.
Should You Buy or Rent One?
Renting can make sense for a homeowner completing one bathroom or backsplash. It avoids long-term storage and lets you access a capable machine for a limited project. Check rental periods carefully because delays can increase the final cost.
Buying becomes more attractive when several projects are planned. Ownership also gives you more time to practice and work without a rental deadline. The right decision depends on how often you work, tile size, available storage, and local rental costs.
Don’t compare options using price alone. Include the correct blade, stand, water-management features, and required cutting capacity. A cheaper machine offers little value if it cannot handle your material or tile dimensions.
Common Cutting Mistakes to Avoid
Poor results often begin before the blade touches the tile. Choosing insufficient cutting capacity can make accurate positioning difficult. Using the wrong blade can also cause unnecessary chipping or slow progress.
Rushing the cut is another frequent problem. Maintain an even feed rate and allow the blade to work at its intended pace. Forcing the tile reduces control and can damage the material.
Skipping test cuts can also waste expensive tile. Use scrap or an extra piece to confirm measurements and machine setup. Repeatable results come easier once the guide, blade, and cutting technique work together.
Tile Saw FAQ
Can a tile saw cut porcelain?
Yes, many wet saws can cut porcelain when equipped with a suitable diamond blade. Porcelain is dense, so blade selection and steady cutting technique matter. Always check both the blade and saw manufacturer’s material recommendations.
Do you need water for cutting tile?
Many common tile saws are designed specifically for wet cutting. Water helps cool the blade and can reduce dust during operation. Never add or remove water contrary to the equipment manufacturer’s instructions.
What size wet saw is best for homeowners?
The right size depends on your largest tile and the cuts you need. Compact machines can suit smaller projects, while larger sliding saws provide more capacity. Check straight- and diagonal-cut specifications before choosing.
Why does my tile chip while cutting?
Chipping can result from blade condition, blade selection, alignment, support, or excessive feed pressure. Check each factor before replacing the machine. A test cut on spare material can help identify the problem.
Is a wet saw better than an angle grinder?
The tools serve different purposes and aren’t direct replacements. A wet saw provides a supported platform for many accurate straight cuts. Grinders suit certain specialized cuts but require proper technique and dust control.
Is it worth buying one for a single project?
Buying isn’t always necessary for a single renovation. Renting may provide sufficient capacity without creating a long-term storage problem. Compare the total rental cost with the purchase cost before deciding.
Choosing the Right Machine for Your Project
The right saw should match your material, tile dimensions, required cuts, and expected workload. Start with cutting capacity and blade compatibility before comparing extra features. A properly matched setup makes accurate, repeatable work easier.
After choosing the machine, don’t overlook blade condition, water delivery, and careful measurement. These factors directly affect cutting results. Practice on spare material before working on pieces needed for the finished installation.
For more DIY planning and home-improvement guidance, explore Livingia’s Crafts & Tools, Bathroom, and Kitchen resources. Matching the tool to the task can reduce waste and frustration. Careful preparation also increases your chances of achieving consistent finished cuts.